Kubernetes Install
Deploy TensorFusion on existing Kubernetes cluster
Prerequisites
- Create a Kubernetes cluster with NVIDIA GPU nodes added
- Install Container Toolkit, this step is optional for most cloud vendors' Kubernetes distribution, they are built-in.
- Optionally, you can refer simple on-premises installation, which won't offer centralized management console.
The installation would take 2-4 minutes to complete.
Step 1. Install TensorFusion
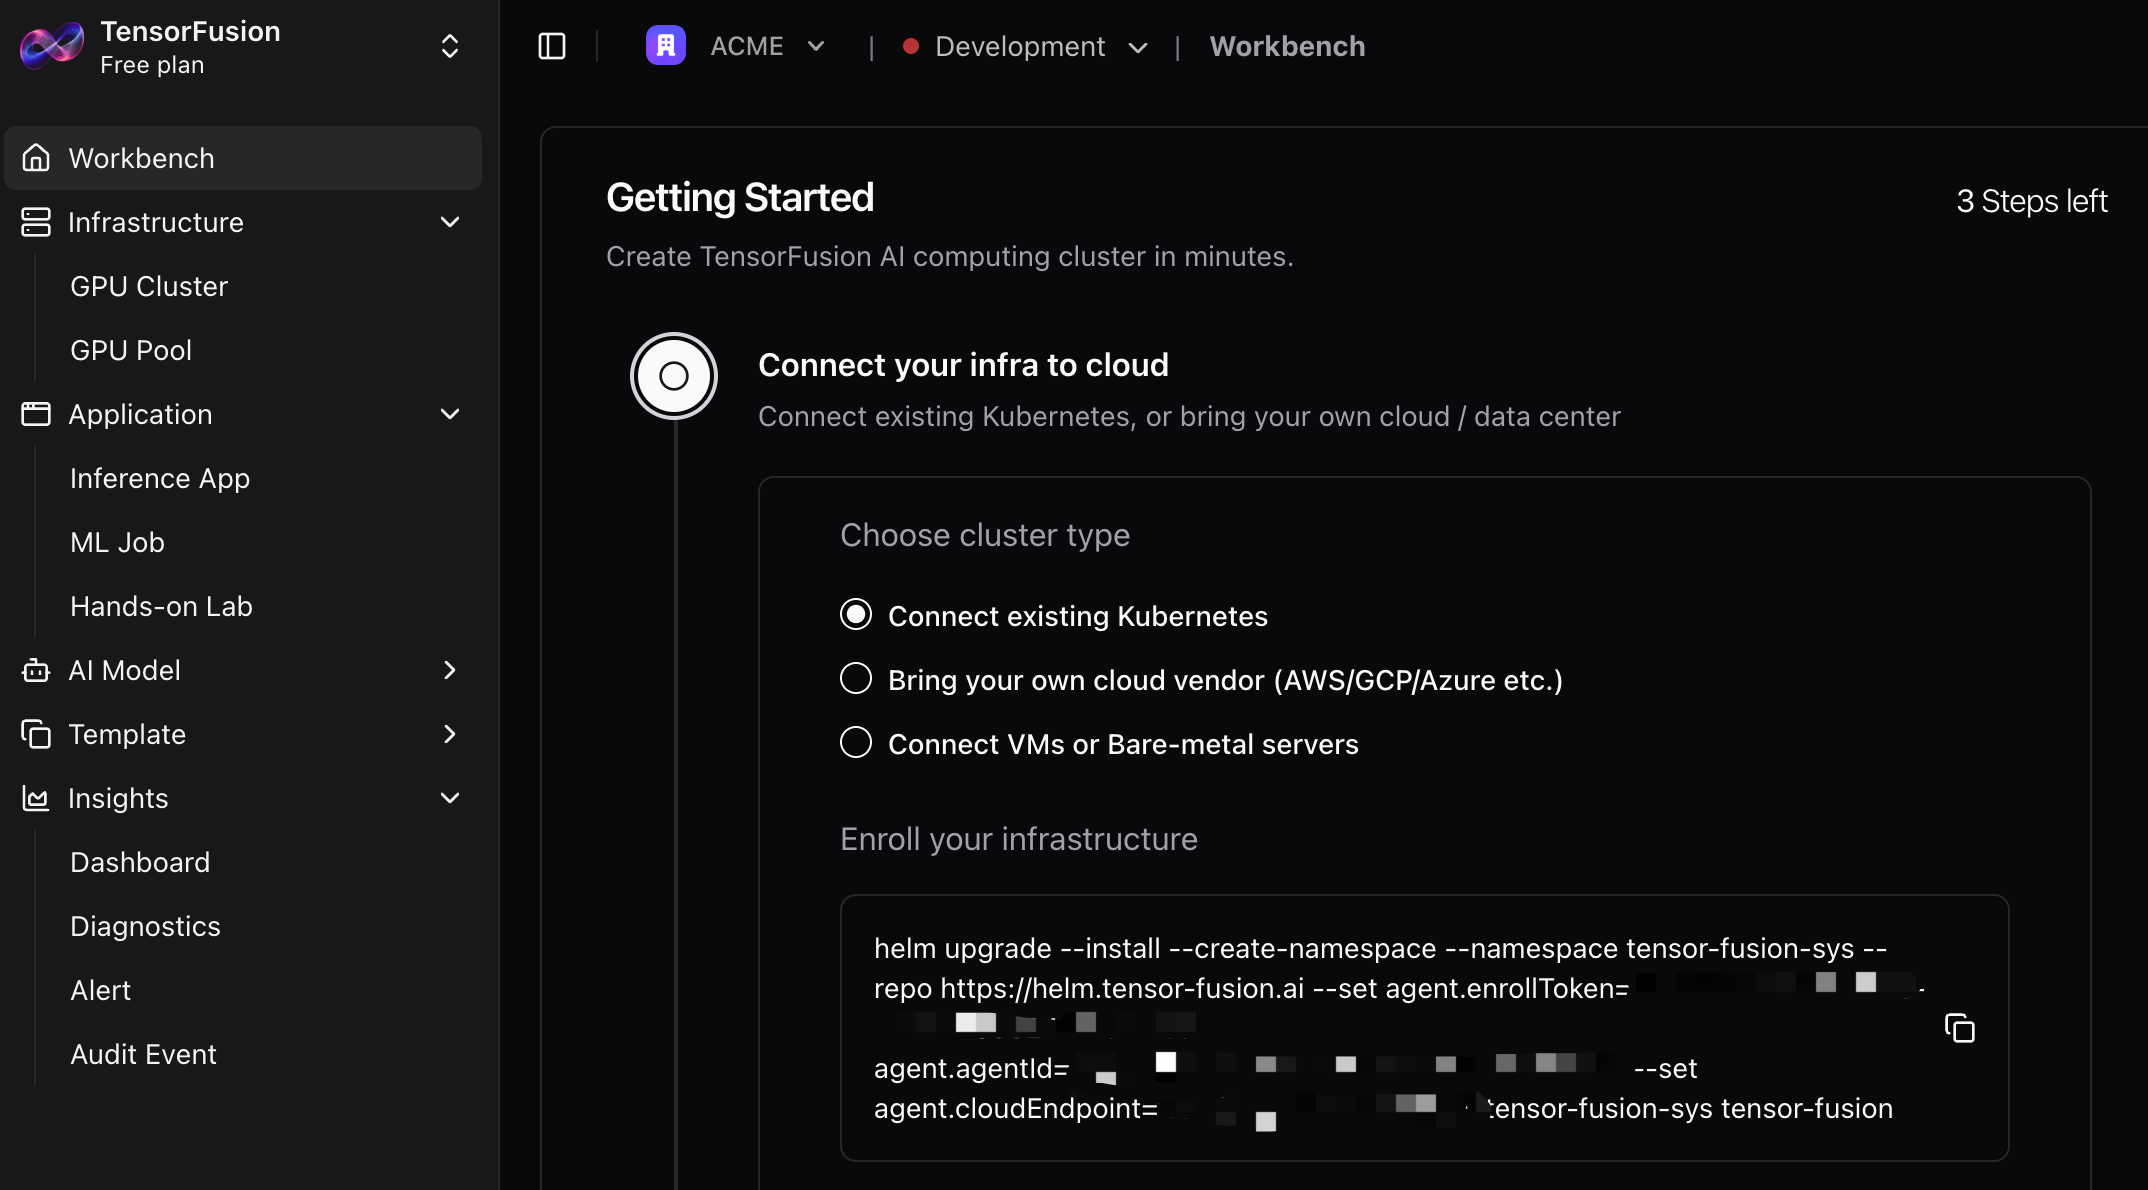
Sign-up your account and then goto TensorFusion Console.
Then, copy and run the command to onboard existing Kubernetes cluster, if you wanna customize Helm Chart values, see Helm Chart Reference
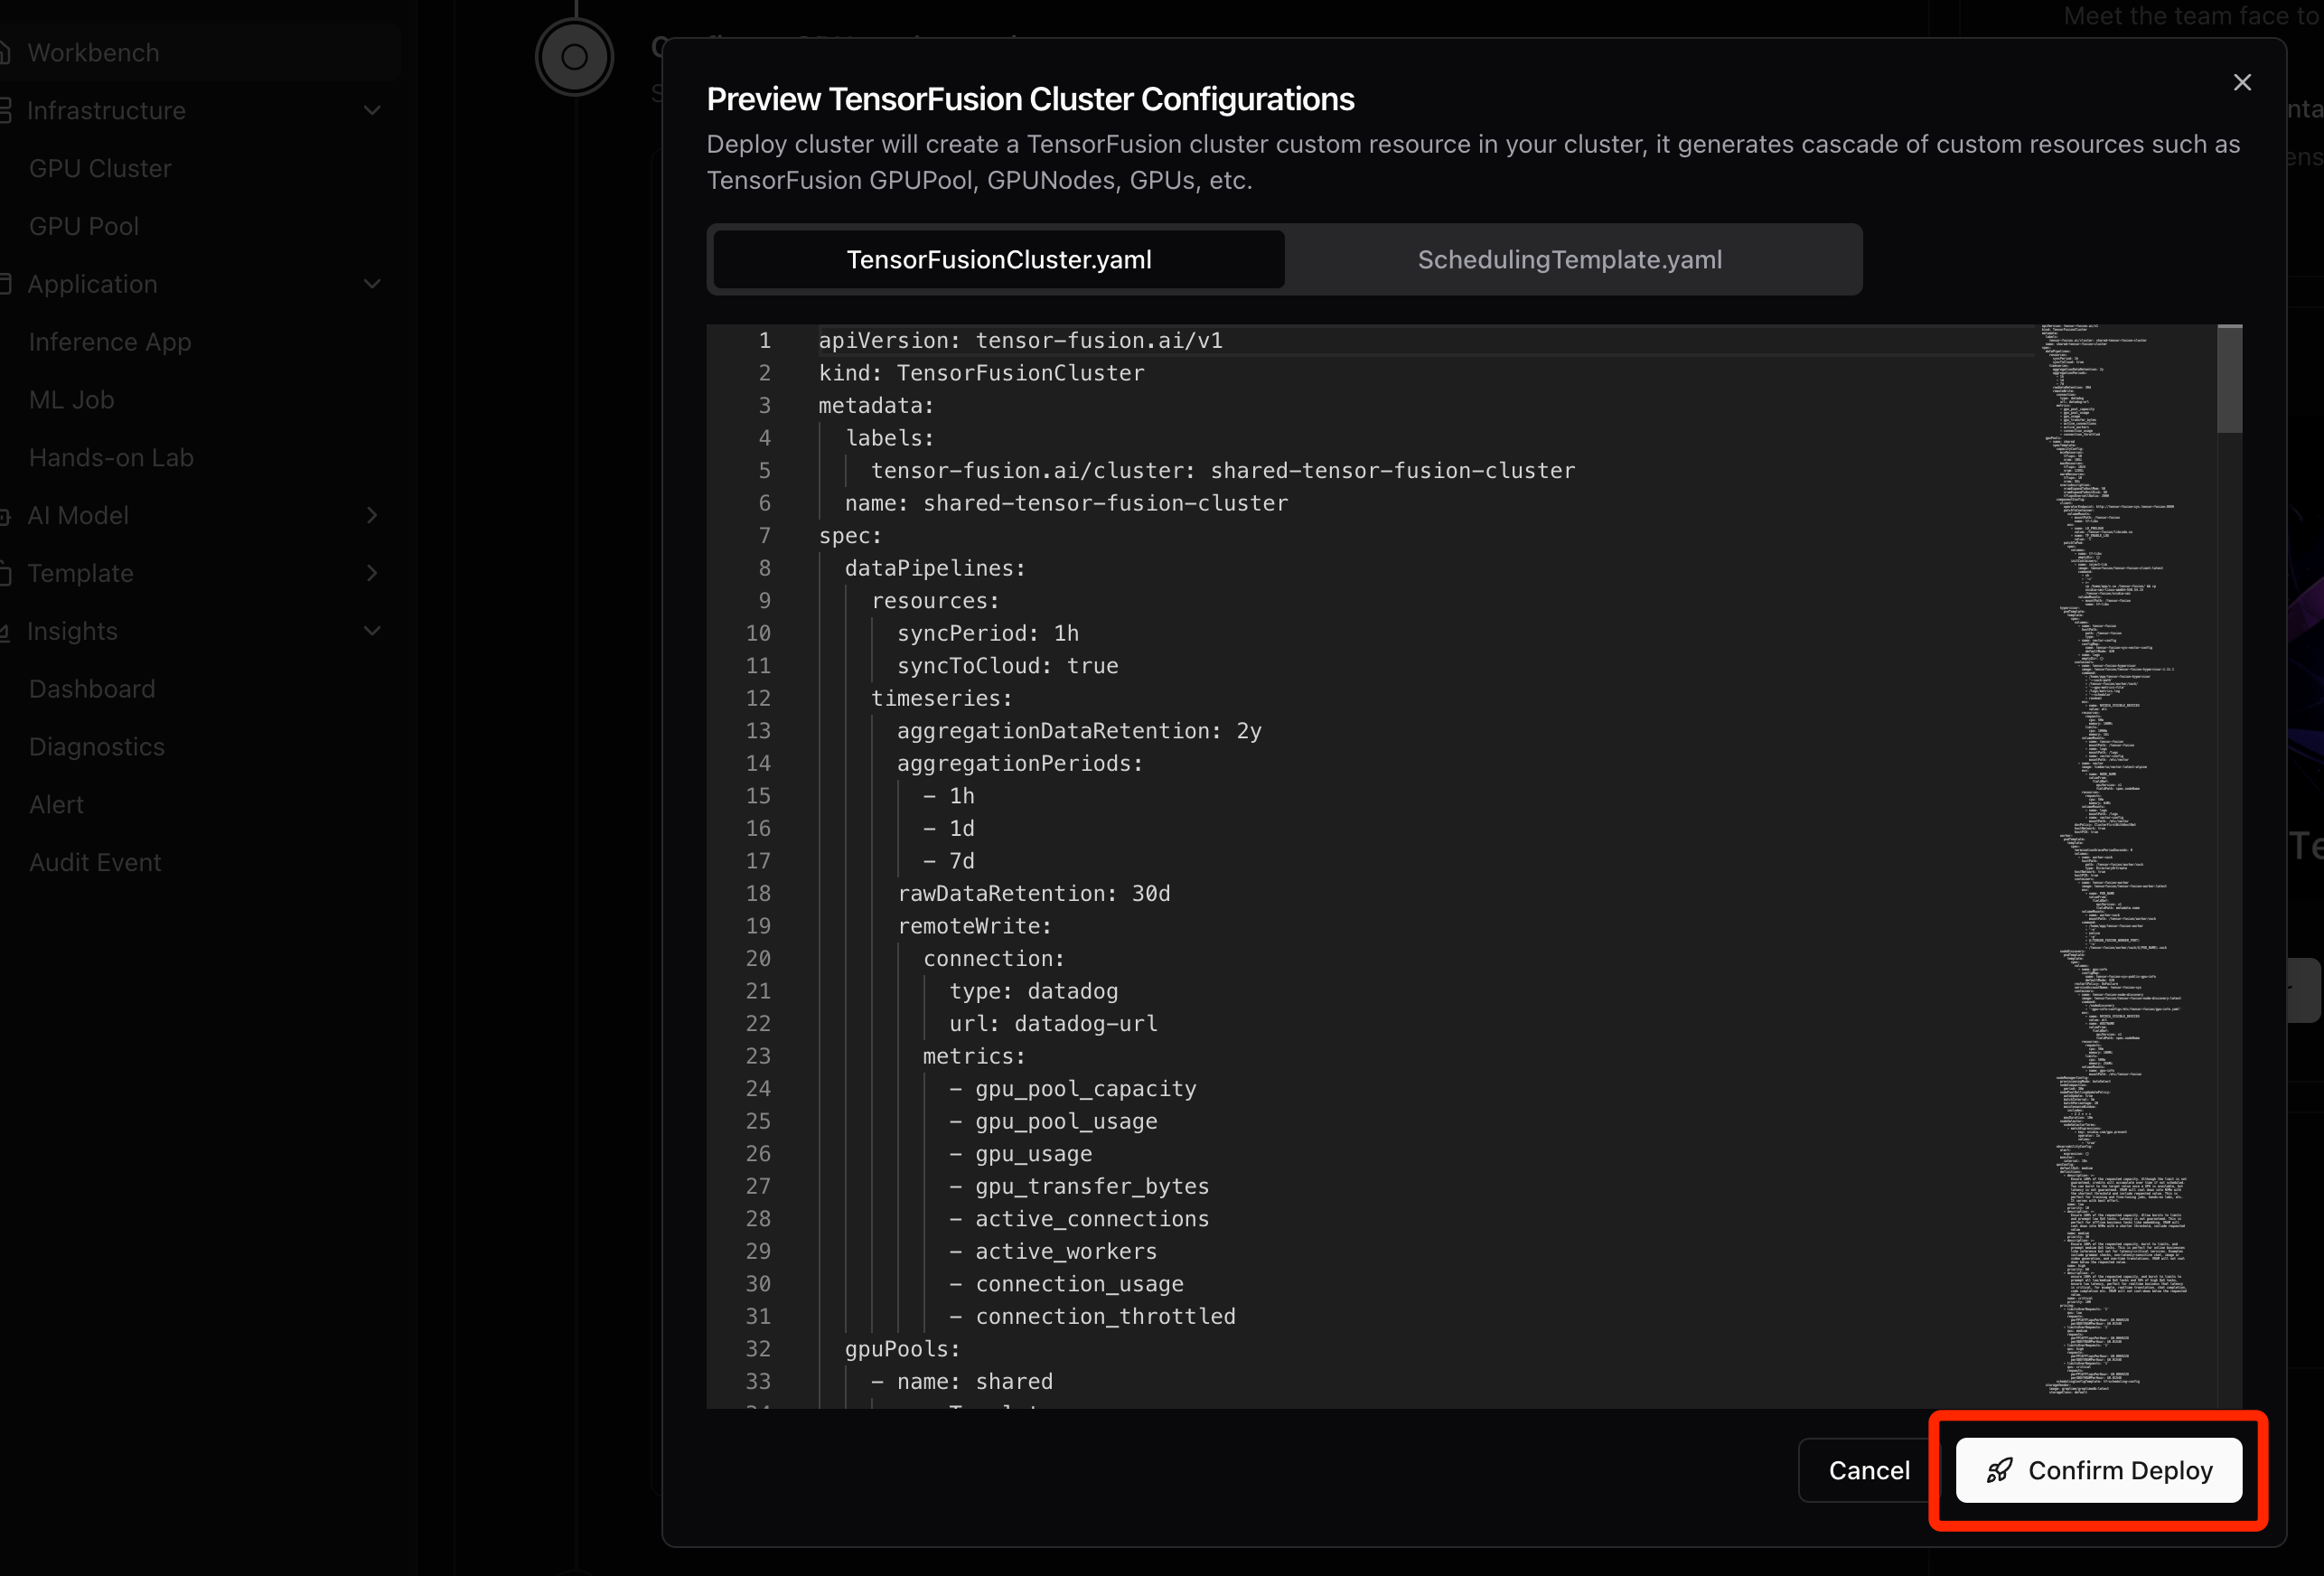
Step 2. Apply the Custom Resources
For TensorFusion cloud installation, when agent is ready, click Preview and then Deploy button to one-click apply the manifests from cloud
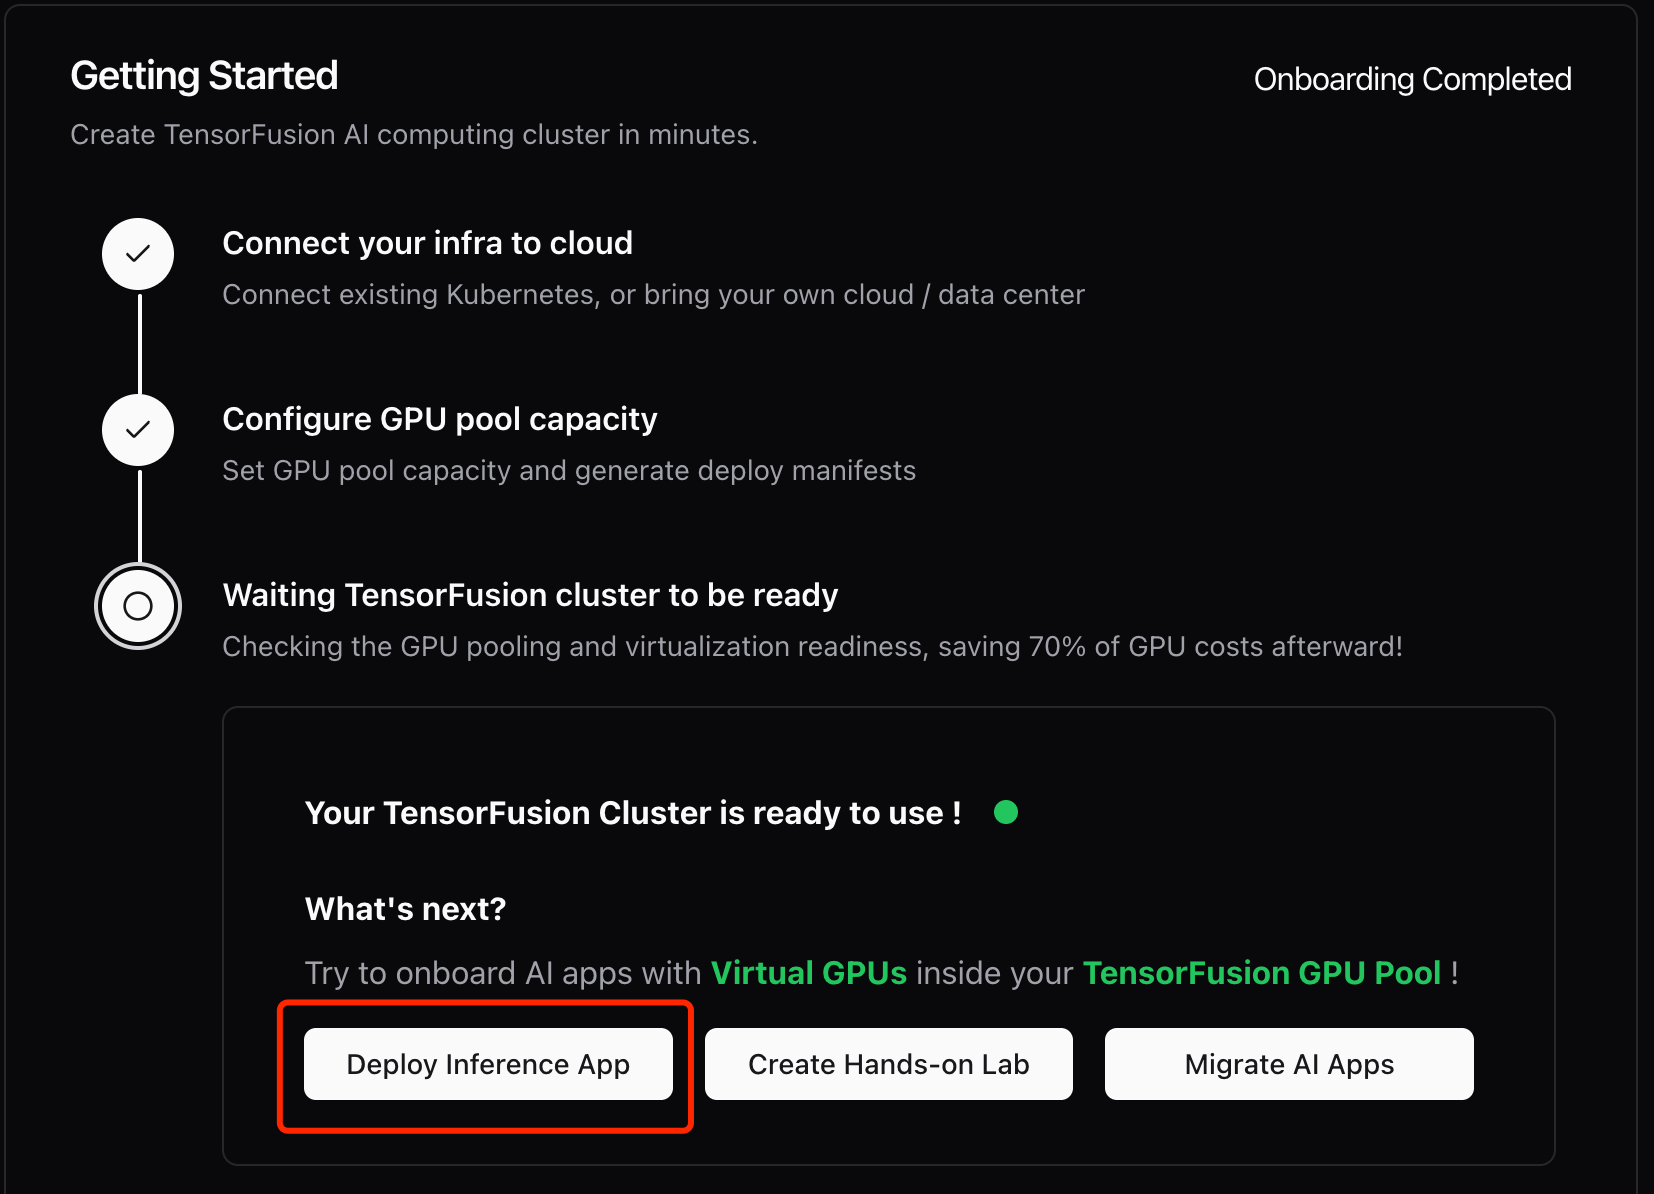
Step 3. Deploy and Verify TensorFusion
When status is ready, click "Deploy an Inference App" to start a simple pytorch container to verify TensorFusion.
Here is the simple pytorch deployment with TensorFusion enabled and GPU resources specified.
# simple-pytorch.yaml
# kubectl apply -f simple-pytorch.yaml
apiVersion: apps/v1
kind: Deployment
metadata:
  name: pytorch-example
  namespace: default
  labels:
    app: pytorch-example
    tensor-fusion.ai/enabled: 'true'
spec:
  replicas: 1
  selector:
    matchLabels:
      app: pytorch-example
  template:
    metadata:
      labels:
        app: pytorch-example
        tensor-fusion.ai/enabled: 'true'
      annotations:
        tensor-fusion.ai/inject-container: python
        tensor-fusion.ai/tflops-limit: '10'
        tensor-fusion.ai/tflops-request: '20'
        tensor-fusion.ai/vram-limit: 4Gi
        tensor-fusion.ai/vram-request: 4Gi
    spec:
      containers:
        - name: python
          image: pytorch/pytorch:2.6.0-cuda12.4-cudnn9-runtime
          command:
            - sh
            - '-c'
            - sleep 1d
      restartPolicy: Always
      terminationGracePeriodSeconds: 0
      dnsPolicy: ClusterFirst
Then, you would see a pytorch pod and the corresponding vGPU worker Pod started (Don't worry, it's super lightweight). Run "kubectl exec" into the pytorch pod, you can run nvidia-smi to see the limited GPU memory and utilization.
nvidia-smiFinally, run python3 to start python REPL console and test a simple Google T5 model inference, the following codes should translate English "Hello" to German "Hallo" in seconds.
from transformers import pipeline
pipe = pipeline("translation_en_to_de", model="google-t5/t5-base", device="cuda:0")
pipe("Hello")
Option #2 None Cloud Installation
When you need fully local installation and don't want to use advanced features, you can try on-premises installation, but you can not use TensorFusion Console for centralized management in this mode.
Uninstall TensorFusion
Run the following command to uninstall all components and custom resources
# export KUBECONFIG if needed
curl -sfL https://download.tensor-fusion.ai/uninstall.sh | sh -